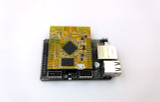
This standard sheild for WRTnode is directly stackable with the WRTnode Mini OpenWRT Dev Board.
WRTnode uses a MTK MT7620N 580MHZ MIPS CPU, and is powerful in both interface and functionality. But expanding its interface with jumper wires is troublesome since there are only pin headers and Micro USB available onboard. This standard shielf for WRTnode not only expands GPIO, SPI, I2C, etc., but also expands the number of USB interfaces to four, at the same time providing a 100m Ethernet interface. Now it's your choice to have messy spaghetti or just one shield on your board.
WRTnode is a high performance CPU, low power consuming, cheap and small dev board that can run OpenWRT OS and also easy to port all open source software of Linux. OpenWRT is a Linux distribution for embedded devices, the framework to build an application without having to build a complete firmware around it; for users this means the ability for full customization, to use the device in ways never envisioned.
Today, more and more devices could connect to internet, named Internet of Things. The WRTnode is a small node which could connect internet all by itself and do complicated tasks. Such as track a cat running over, identify what you are saying and twitter it, check email and pronounce for you, learn how your room layout and find garbage to sweep while streaming camera video to you over internet. Just to name a few.
Note:
- Be sure to plug the WRTnode into the shield as shown in the picture, Be sure DO NOT go wrong direction.
- For the power we recommend a 5V USB-interface adapter higher than 1000mA, when more USB devices plugged in, we recommend a 2A or 2.5A adapter, such as your ipad one.
Specification
- 5V micro-USB DC-in
- Extend 4 standard USB port
- 1 RJ45 100M Ethernet port( to be a LAN port or WAN port as you define)
- other interfaces:
- UART
- I2C( while could multiused as GPIO * 2)
- SPI
- GPIO*12
- Uboot web-page fail-safe de-brick button
- 5v and 3.3v pins
- Size of layout: 80*48.5*20mm
- An original WRTnode U-Boot WRTnode_U-Boot_instructions will provide this, if there's another U-Boot have been flashed, this section is invalid.
- instruction:
1. Set your computer Ethernet with the IP: 192.168.1.100 and the mask: 255.255.255.0, connect computer and the shield with RJ45 wire.
2. Push the button( in this case to prevent misoperation, we use a very tight button, please make sure to hold the button tightly with nail or blunt object.)
3. Power on
4. WRTnode sense the pushed button, the led indication on WRTnode will flash for about 5 seconds. While, we could use web browser in the computer with URL: http://192.168.1.1/ to flash the ROM.
Download:


