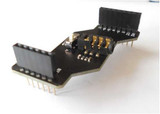
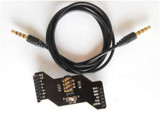
You may have several ways to make your Arduino communicate with your Android phone or iPone, such as through bluetooth, or wifi. However, you have an much easy way to do this, through audio jack. Now we supply this Arduino Softmodem for iPhone or Android.
Phones from different company have different headset pinout, for example, Sumsung's Galaxy is different from iPhone. Here we add a switch to make it be compatible with both.

This serial modem allows you to interface an Arduino board with your iPhone or Android smartphone through the audio jack. Now you can integrate your smartphone into your next embedded project. Some software is required on the phone side, and of course there is an Arduino library.

Because the modem and supporting software exploits a connection originally intended for audio, some corruption of the serial data is to be expected from time to time. It's recommended that you keep this in mind when writing your code. See the links below for more information on the board, the Arduino library, and how to implement it.
Example
Arduino Softmodem could be utilized in many project. Here I will show you one example supplied by 9lab. Please visitiOS IR Remote with Arduinofor code if you are interested.
We all love to impress (and sometimes annoy) people with our little gadgets and electronics. I remember that I used to turn off the TV in the classroom with my Casio infrared remote control watch and fool everyone in my class(I bet some of you also did the same thing), and today 9lab wants to bring the fun back with Arduino, some infrared LEDs and your iPhone.

iOS IR Remote
How it works
Basically, how remote controllers work is, the buttons on the control panel will trigger a certain command, and the microcontroller on the board will code the command in binary format, then controls the infrared LED to blink in a certain way according to the code. On any device you want to control, the infrared receiver will catch the signal and decode command, so that the device knows what it needs to do.
The structure will be the same if we want to make it for smartphones. The smartphone needs to be able to encode a command and control the infrared LED to blink. Since there's no direct access from the phone to the LED, so we need a microcontroller to listen to input from the smartphone, and blink the LED accordingly.
In order to be compatible with almost all smartphones, including iPhone and Android, we choose headphone jack as the interface between the phone and the microcontroller. This means we will use audio signal to represent the command, which the microcontroller will not be able to read directly. In this case, we need a soft modem to do the translation.
So here are the hardwares that we used:
1.Arduino Uno x 1 (as the microcontroller)
2.Soft modem x 1
3.IR LED x 1
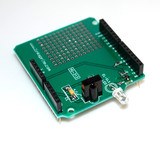
4.Arduino breadboard shield x 1(just for cleaner prototyping)
5.Headphone wire x 1

Hardware setup
The hardware setup is not very complicated. Connect soft modem to Uno(pins), and connect the breadboard shield on top of them, then connect the IR LED to Uno’s PWM pin 3 via breadboard. Finally, connect the soft modem and the iPhone with the headphone wire. Done.

Hardware setup. The deep gray part is the soft modem.
Arduino coding
The Arduino Uno has to take care of the LED blinking, and also listen to soft modem input. When dealing with the soft modem input, the coded command can be several byte in size, so we need to buffer the input data to get the complete command. We used 3 libraries in our codes to do IR control(IRremote), soft modem listening(SoftModem) and buffering(ByteBuffer).
In the setup function, we need to initialize the buffer and soft modem.
void setup()
{
Serial.begin(9600);
// Initialize the buffer with a capacity for 4 bytes
buffer.init(4);
delay(1000);
modem.begin();
}
In the loop() function, Arduino will keep listening to the soft modem. While soft modem is available, we read 2 bytes from the soft modem. Then check if we need to clear the buffer. If not, we put the 2 bytes into the buffer. This is how we get the command from soft modem. When we get the command, we simply use a IRsend to send the command to the IR LED under NEC Protocol.
void loop() {
while(modem.available()){
int c = modem.read();
if((buffer.getSize() == 4 || buffer.getSize() == 0) && c == 0xFF) {
buffer.clear();
} else {
buffer.put(c);
}
}
if(buffer.getSize() == 4) {
long cmd = buffer.getLong();
Serial.print("Sending cmd: ");
Serial.println(cmd, HEX);
irsend.sendNEC(cmd, 32); // NEC Protocol command
delay(100);
}
There’s one issue we encountered when we ran the code. Both IRremote and SoftModem library are using timer2, so we had to uncommented line 61 in IRremoteInt.h to resolve the conflict.
iOS App
The demo app is very simple. We have 2 buttons on the main view, and each button represents a command. We also have an info view, in which you can change the command for both buttons. Once the button is pressed, we will use a serial generator to encode a audio signal representing the command, and the signal will be received by the soft modem.
- (void)buttonPressed:(UIButton*)button {
NSString* buttonKey = (button.tag == 1) ? @"first" : @"second";
NSString* hex = [[NSUserDefaults standardUserDefaults] stringForKey:buttonKey];
hex = [hex substringFromIndex:2];
NSData* hexData = [hex hexToBytes];
//NSLog(@"%@", hex);
//NSLog(@"%@", [hex hexToBytes]);
[APP_DELEGATE.generator writeByte:0xff];
[APP_DELEGATE.generator writeBytes:[hexData bytes] length:hexData.length];
}


