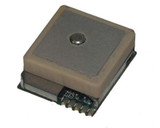
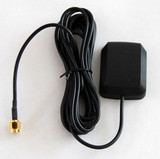
This GPS receiver comes with embedded antenna and only needs 5 pins to talk to your Arduino or MCU.
Pin 1: GND Ground
Pin 2: VCC Power supply of 3.3 ~ 3.5 VDC
Pin 3: TX Port A serial data output (GPS out); N-8-1, NMEA v3.00 output
Pin 4: RX Port A serial data input (GPS in); N-8-1, accepts commands from external applications, e.g. SiRFDemo.
Pin 5: 5 PWR_CTRL Hardware controlled power saving pin.
If this function is used, it is usually connected to a GPIO pin of a micro-processor.
"Low": for normal run
"High" or floating: turn off VCC for power saving
Tie it to low if this pin is not used.
For Arduino application, we recommend aspen board: http://www.cutedigi.com/product_info.php?products_id=4577
Not only handheld but also any other GPS applications can share the following major features
of SR-92.
- Easy adoption with best performance
- Integrated antenna and EMC protection
- Built-in backup battery allowing hot/warm starts and better performance
- No external component demand, just connect and use.
- Minimum RF and EMI efforts
- Small size of 18 (W) x 21 (L) x 7 (H) (mm) with patch antenna of 18x18x4mm.
- Fully implementation of ultra-high performance SiRFstarIII single chip architecture
- High tracking sensitivity of -159dBm
- Low power consumption of 40mA at full tracking
- Hardware power saving control pin allowing power off GPS via GPIO
- SR-92 could be arranged at best reception location inside housing
- Firmware upgradeable for future potential performance enhancements
Download:
Download SiRFdemo software that can be used to configure the baud rate, etc
Real time GPS tracking tutorial:
http://www.cutedigi.com/bbs/index.php?topic=403.0
Arduino GPS Tutorial
1. Get some male to male jumper from:
http://www.cutedigi.com/product_info.php?cPath=243_288&products_id=4242
Cut in the middle.
2. Solder on the the 5 pins of the GPS receiver module:

3. We will first bypass the MCU, and let GPS directly talk to PC using the USB.
The schematics is as follows:

For the other three pin, we connect GND to Arduino's GND, VCC to Arduino's V3.3V pin, and the POWER_CTL to Arduino's GND as we want the GPS always tracking for now.
For convient, we used Arduino Protoshield (http://www.cutedigi.com/product_info.php?cPath=284&products_id=4262)


4. The Serial terminal we will is is X-CTU from digi.
The data manual says that the default baud rate is 4800. However, on ours, we found that the default one is 9600.


